2D Shadows
In this final task we will look at an 2D shadow algorithm (or you could also call it 2D visibility algorithm). We can regard our origin point as a point light source or a point viewer (with 360 degree vision).
To achieve that we are going to use ray casting. We represent all the boundaries of our objects in 2D with line segments and then test the intersection between rays and line segments. From our origin point we shoot rays towards all the vertices of all our objects. This is because all our lines are straight and thus on the boundary there has to be at least one vertex.
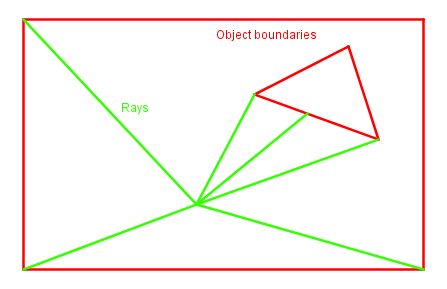
Now, as you can see, the rays we shoot at the vertices will get stuck at them. Of course, if another object is in the way (and the view is blocked), then we get the correct result for that ray. But if nothing is in the way, the ray will stop at the vertex it is shot at. You can think, that maybe we should just ignore the collision with that polygon? That would not work either, because if the polygon continues on both sides of the vertex, then you shoot through it when you actually should collide with it.
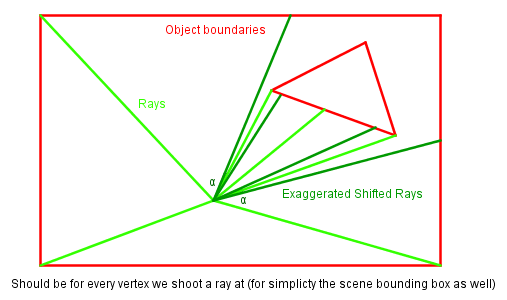
The solution to this is to send two more rays at each vertex. Each of them rotated a little to just miss the vertex from the left and from the right. Possible shift for the rotation would be -0.001 and 0.001 radians for example. Depending on the accuracy of the intersection testing, that may be different.
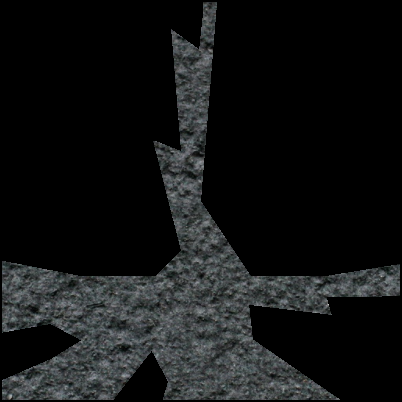
We want to construct a polygon that covers all the visible (or illuminated) area from our origin point. The intersection hit points of our rays and the origin make exactly that triangulized polygon we are looking for.
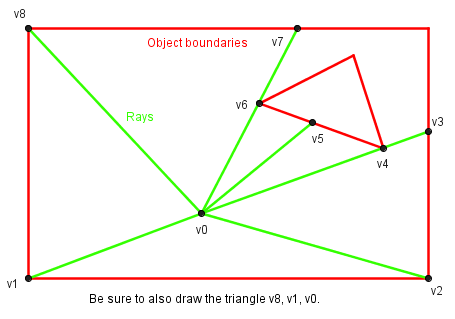
Now, that can be constructed with either just specifying the consecutive triangles or just with a triangle fan (when repeating the v1 also as the last vertex).
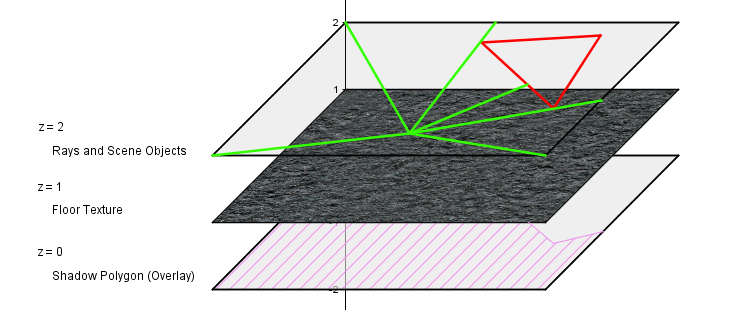
After we have found the shadow overlay (underlay?) polygon. We can draw it white and together with multiplicative blending draw other objects on it so that they are only visible on top of the polygon. Everything not exactly on top of the polygon will not be rendered (or are rendered, but then turned to black with multiplicative blending).
In order to achieve that we can assemble 3 layers. On the bottom-most there will be the constructed shadow polygon. On the middle we can have something that we draw, like a textured floor. On the topmost layer we can put the boundaries of the objects, the rays and do the intersection testing.
This is the algorithm we will be implementing in this task.
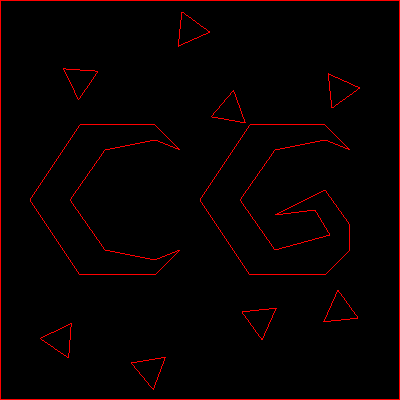
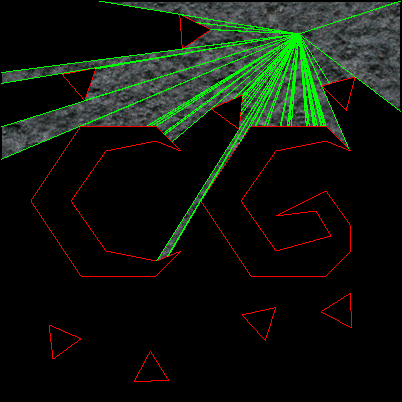
The base codes are perhaps a bit larger than usual. Initially you should see a 2D scene with some objects (C, G and rotating triangles) in it.
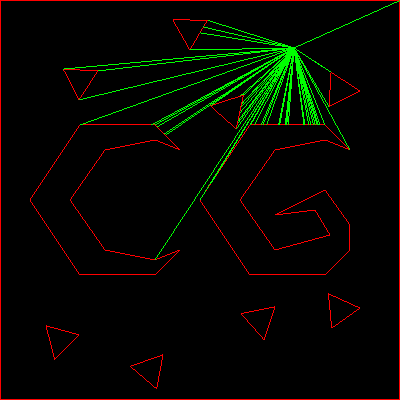
First thing to do would be to start constructing the rays and drawing them. They will be shot from the mouse's position. Initially you could shoot the rays directly at the vertices for simplicity. That should produce this result:
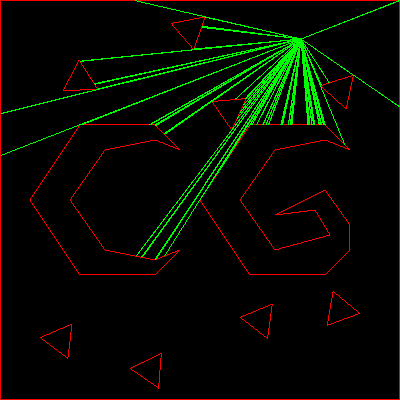
Next you probably want to rotate the ray directions a bit so that the rays would not get stuck on the vertices if there is room to shoot past it.
After this (or together with this) you can also construct the shadow polygon. For that you need to order the shot rays by their angle, counter-clockwise. Make sure that you have not forgotten about the last triangle in that polygon and everything should work.
The last step would be to render a textured floor and use multiplicative blending to make it visible only there, where there is a white shadow polygon underneath. This, of course, means that the shadow polygon needs to be drawn first (not just rendered first, but also rendered to the color buffer first).
Alternative way would be to construct a complementary black polygon for it inside the scene's bounding box. That could be on the layer above the floor and blended together from the top. Probably in another situation that could be a better approach, because you could then draw the scene normally and then really overlay a multiplicative black (or even a dark gray) polygon on the areas you want to hide.
Depending on if you use JavaScript or C++ the actual final result may vary a bit.
JavaScript
In the base code there is a objects.js file, where all the scene objects are made. Only thing you need to change in that file is the blending at the last step. Everything else to do is in the index.html file. You probably want to assemble both the rays and the shadow polygon together here. For rendering Three.js uses GL_TRIANGLES, so keep that in mind, when constructing the polygon faces.
Here is the base code:
https://cglearn.codelight.eu/files/course/15/2D/2DShadowsJS.zip
There is also a variable isDebug that turns on/off the ray and object boundary rendering. So the results can look like:
 |
 |
| isDebug = true | isDebug = false |
|---|
C++
There are several classes in the base code. This is one approach to encapsulate some of the logic into different structures. Most of the things needed for the implementation are in the Rays.cpp file. In order to sort the rays, refer also to the Rays.h file, where there is a definition of one Ray. In order to blend the floor, look in the Scene.cpp file and enable the multiplicative blending and floor drawing in the draw() function.
Base code:
https://cglearn.codelight.eu/files/course/15/2D/2DShadowsCPP.zip
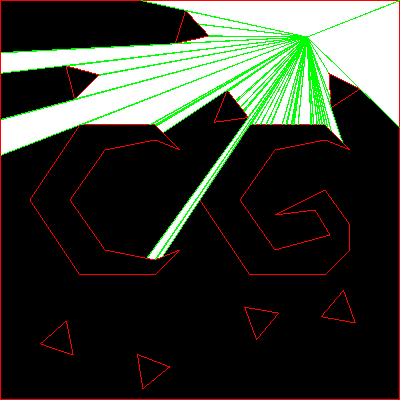
Because the drawing order here is a bit different from JavaScript, then the result with the ray lines will probably look like this:
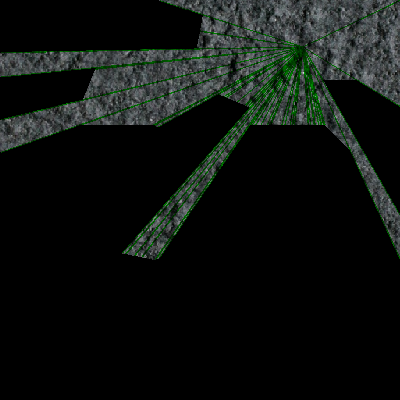
You can, of course, disable the ray drawing at this point.